

I'm calling this a SECRET because I see and hear every day that there are people out there, embroidery people nonetheless, who don't know about this product.
It's called HEAT N' BOND LITE!! Add it to your get-it list!! It will change the way you do applique and rock your world! It will IMPROVE your applique and make all the difference in a good looking shirt, and maybe a so-so looking shirt. (I'm not an employee of Therm-O-Web nor do they pay me to promote this product. I get nothing from this product but great looking appliques!)
Did I mention I love this product? That's why I have a drawer full of it friends (see below)! I buy mine at Joann (without an 's'). When they have SEWING NOTIONS at 50% off, I go in and stock up. I also get 50% off coupons all the time in the mail and on my phone (Iphone App is available) so I always take advantage and stock up! You can also buy it at some Walmart stores (although I have never seen any in ours), and by the yard at Hancock Fabrics. They may sell it off the bolt at Joann but I've honestly never asked or looked for it. I've also talked to Steve at www.Sewingmachine.com about this product and I used it when I did my little class there in October. They will hopefully be selling it soon. Anyway....

It comes in this package and is simply a roll ~ one side is paper and one side is shiny and a little textured.

Make sure you get LITE and not ULTRAHOLD. I've been using HNBL for a long long long time and it has never gummed up my needle.

First... you've sewn your marking stitch for the applique you are working on. Mine is the zig zag tiara. HNBL works especially well with zig zag designs because without it, your fabric will most likely fray.

I cut my piece of fabric large enough to cover the design.

I iron my piece of fabric. Notice my iron is on about medium heat.


Iron the HNBL light with the shiny side down. Again, you are ironing on the paper side.


I lay the fabric shiny side down on the marking stitch and now you're ready for the tackdown stitch. (I do not use any type of spray adhesive to stick the fabric to the shirt at this point. Some people do but I do not.)

Now it's time to trim around the tackdown stitch. You might be able to see in this picture that the fabric underside is shiny. That's the HNBL. It also helps in this trimming process ~ there aren't any loose threads, as the HNBL is like a coating on your fabric. (Notice my Gingher 4" curved embroidery scissors - love them!)

The applique is ready for the final stitch, and in this case it's zig zag! As you can see the cut is very clean!


Again, the applique is finished, but now it's time to FUSE the applique.

Iron over the applique. I keep my iron on medium heat. I iron over the applique and also let it sit on it for a second or two. If the applique fabric doesn't seem like it's fusing (still bubbly), I spray it with the iron water and then iron over it again. The applique fabric will "harden" a tad and you will be able to tell that the fabric is "set".

You might see a difference here ~ the applique is FLAT. The fabric is fused to the garment.

Lastly, I finish the back side of my applique with Comfort Cover, aka Floriani Dreamweave (there are a variety of different brands of this product, including Sulky).

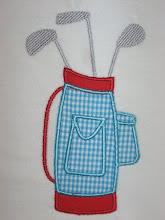
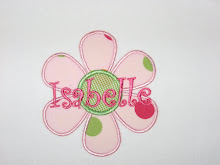
Here is your finished product!
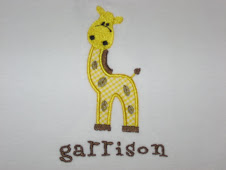
Does your applique look like this??

I recommend this product all the time to people and no, I am not getting paid to do so! I have found it works great so I recommend it whenever possible! If you're appliques are bubbly, you need this! If your appliques sometimes come loose after washing, you need this! EVERYONE NEEDS THIS!! Get some if you don't have some and see how much better your appliques turn out!


10 comments:
Thanks Rosemary, This is the tutorial I've needed all this time. It helped me in every way possible. I'll never be without it now!!!
Rosemary - I run a small embroidery business on the side and have loved reading your blog and all the good tips. I will be getting heat and bond ASAP!
I used the 50% off coupon for the 75 yard boxed roll a few months ago!!! I cut a strip of HNBL and put it on all my fabrics prior to using-I do it in larger sections, because it is easier for me (i.e. I HNBL an eighth of a yard at a time). Love using HNBL and, like you, have never had a gummy needle.
:)
I'm definitely going to try this today! What stabilizers do you use?
Getting Heat and Bond today!!! I wondered why it did that.
I love your blog and appreciate all of the tips you share. Just wanted to say that I tried HNBL and the Gingher 4" curved scissors per your recommendation awhile back and both have improved my applique experience. Just wanted to say thanks!
Love the new blog & I absolutely LOVE Heat'N'Bond Lite. I use my own variation of these steps. Once I cut out around the design I use a small travel iron that will fit into my 5x7 hoop to fuse the fabric to the shirt before the final stitching. I use the tiny craft iron in my 4x4 hoop. I do this so I don't have to iron over the final design which results in flattening the satin stitch look.
I use a GLUE STICK to hold my fabric down.. I don't like spray since it leaves my hoop dirty looking after sometime.
I've heard about heat n bond light for machine appliques but never tried it.
I use it for my SEWING appliques mostly so i can hold them in place until they are sewed down.
thanks for the blog post !! I had heard about this technique but wasn't sure how exactly it all worked out :)
Excellent tutorial! If people don't follow this to a 'T', then they are nuts!! :-)
I was also wondering - what type of stabilizer do you use? I notice that you use the Comfort Cover on the back of the finished product but can't tell what kind of stabilizer you have. Thanks!
Dawn in Enterprise, AL!
Post a Comment